7/09/2010

Reusable grocery bag and Doggy treat pouch

Right after I came back from Chicago, I had to fly to Kona for work again.
I didn't even have time to unpack! but I like traveling, so I didn't mind :) 
My husband is the one doesn't enjoy it much though, he hates to be away from me :P
So, while in Kona,  I got to visit the fabric store I've found nearby hotel I was staying at.
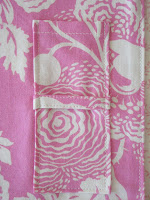
This is one of them I got that day.
So cute I had to get it! Love the colors, don't you?


I've got a few Japanese sewing books while in Chicago, and I wanted to try one of them.
So, I made this reusable grocery bag.
It's same design as regular plastic bags and the size is so large I can fit anything in it!
I actually have been using it to just carry stuff around, but I'm sure it'll come in handy when I go grocery shopping!


I wanted to make more things after I finished this and I already had an idea in my mind.
I've been hiking every month with my dog recently and I was in need of something.
When I take him hiking or just to the park, I usually take his treats/snacks to give him.
I used to carry them in a plastic bag as sold at the store which I didn't really like being loosely open.
So, I had this idea with a small pouch that I can carry hands-free that had a sealing to keep his snack tightly closed!
I was going to use one of those small ziploc bags, but I happened to have this ideal size bag.
It is the perfect size I was looking for and it has a sealing and the bag is very durable! Perfect.

I cut the remaining fabric to the size of this bag, sewed it together, slipped the bag in.... and came to find out the bag didn't fit in the arm of the sewing machine to sew it together.
So, I hand-stitched to put them in a place.
After I did that, I realized I should have sewn the ribbon on before attaching the bag.... sigh...
I didn't want to undo hand-stitching part to do it all over again, so I changed a plan to attach the ribbon from outside... oh well, it worked.


Voila! Here is the treat bag I've been picturing!
I love it!!!!!! Now I can go hands-free or bulky backpack-free to satisfy my little guy!


This is how it looks inside.
His snack will remain fresh in this tightly sealed bag :D
He loves it too because every time I grab this pouch, he dashes over to me... oh... maybe he loves his treat not the pouch....
Either way, I'm happy with this yummy pouch


This is how it looks on me, quite a small size.
I like having an instruction to make like the grocery bag, but I enjoy making my own out of my imagination too!
I just have to have a very good plan so I don't forget to skip the step like placing a ribbon before stitching up to close it lol


Hmmm, what to make next....?


7/07/2010

Hand-stitching Felt Pouch #3

Wow, it's been a month since the last post? Oops!
Well, I've been here and there doing things... 
Chicago was great! I got to see my friend back from college too!
I got to visit places I used to go when I was in college, so it was very exciting!
I did get some craft stuff as I was hoping, so that was an icing on the cake! 
Oh, and work was good too, I almost forgot I worked. lol 
Although we had a thunderstorm wandering around to make me nervous, I survived! (I do flight operations, by the way.)
It's hard to handle different situation when you are in a whole new environment that you don't usually get. It's always a good weather here at home, so dealing with thunderstorms and winter operation (not this time) is nerve-racking for me! 
Luckily no affect to our flights.. phew! 
Enough about work, let's talk craft!


I've made a couple of things between the busy days.
Here is the 3rd pouch of the felted series.
This time, circle shape and a squirrel. Very cute!

 Again, I did a blanket stitching along the edge.
As always, it is a very nice size I use it as a coin purse.
Oh, this cutting mat is one of the things I got from Chicago along with a rotary cutter! 
So excited finally got them! I would've gotten a bigger one if it could fit in my suitcase; that's if I could afford it..... Now I really need a craft room with a nice table! :D


I already got the next one waiting to be stitched up as well as other crochet/knit projects in a long line....
It's like I get full looking and thinking about making it that I don't get to the actual making part! lol


I'll try to post more often! 
Please check back!
Hope you all had a great 4th of July!

It's my weekend! Whoooo ray!
Later!

6/09/2010

Hand-stitching Felt Pouch #2

I am off to Chicago for work in a couple of hours.
I've been meaning to finish this second pouch up, so I whipped this cutie before I'm off to the Windy City :)
I also didn't wanna take my glasses case that's little too bulky, so I was stitching this up hoping they would fit in it.
  
The kits: Very cute color and a pattern! I think I can actually use the negative on some other project, too! The pouch measures about 7" wide.
 
 As I planned from last time, I did the blanket stitch around it, I think this looks way cuter! What do you think? It seems like you can fit more this way too. 
Oh yeah, this time I used sewing machine to attach a zipper.
It was way faster, easier and most of all, the stitches are all equal unlike the first one! LOL
Another check mark, for using a zipper foot!

And as I hoped, my glasses fit in PERFECTLY!!!! Whoooray! I had to yay with a smile as they slipped right in!
      

Hopefully I get to find some crafty thingy in Chicago.... Oh but of course, work comes first!!!!!! *wink*

6/07/2010

Picnic-Tastic Lunch Mats

I need to be finishing up another knit pouch I've started (half way done), but I tend to jump around..
So, when I was flipping through One-Yard Wonders to look for a cute stuff to make, these lunch mats caught my eyes.

You can make four of these mats with 1 yard.
I picked the Midwest Modern collection by Amy Butler (yummy pink!!) that I purchased online before, but since I only had a 1/2 yard of it, I ended up with 2 mats and because of the way it was cut, I had to adjust the size too.


It has a pocket to hold the utensils and a little napkin holder, so you won't have to chase after those flying napkins at a picnic! What a great idea!


Because of the shortage situation, it came out a bit smaller and a pocket looks skinnier, but it sure serves a purpose!! :D
My husband liked it, too. I love how he always gives me a comment on my projects!
I think I'm going to use this for lunch time at work :)


Even though we hardly go on a picnic, I guess I've got an excuse to go now... just to use these mats! lol

Lunch Bag

I've been using this little bag as my lunch bag to work that came as a bonus in a magazine. 
It's getting little old with stains and all, so I've been wanting to make a new one exactly the same size as this since it's a good size. 
I traced this bag on a wrapping paper to make a pattern of it and cut the fabric out.
I was trying to remember how I made a similar tote bag at the sewing class when I had extra time after finishing the elastic pants...
My memory was good enough to make it as I wanted!! Yay :)
Here is the outcome of it...


It came out exactly as I wanted, so I'm very happy with it :)
It looks quite big in the picture, but it's really small, just the right size for your lunch!
I've used the old one as a run-to-the-store purse too, so I'm pretty sure this one will come in handy as well.
 

5/21/2010

Knit Pouch


The second knitting kit were the pouches. It came with these two colors of yarn.


I did make a "practice" one with blue, but I didn't really care for the color too much...
Coincidentally, the zippers in the kit were again, pink and green! So, I decided to make with my own yarns using these zippers.

This time I learned how to increase and decrease the stitches addition to adding a design like from the last kit.

And of course, how to apply a zipper...

As you can tell, it was time-consuming and a struggle! I almost got attempted to use sewing machine instead of hand stitching it, but it probably would be still difficult to do anyway...!
My yarn was a bit thicker than the one came with the kit, so I had to adjust a little to fit a zipper in, maybe that made it even more difficult! Argh... but pink was irresistible!
Overall, I'm pretty satisfied with how it came out even though it is a bit crooked.. lol
Green one to come... soon, hopefully...

5/17/2010

Sewing Machine Cozy

My sewing machine didn't have a cover, so it naturally became my project :)

I chose "Sewing Machine Cozy" from Sew Everything Workshop book by Diana Rupp.
You are supposed to use Oilcloth, but since I didn't have it I used regular cotton fabric...


I've been also curious about bias tapes as I was with a blind hemming foot. I like how it gives a complete look to the item! As I kinda guessed how to apply it, I struggled. Especially the inside corner, the handle hole part! The end part is too ugly to show X(


The sizing was a challenge too... I thought the measurement in the book was little bigger than my machine, so I first cut the depth 1" shorter, but then I thought "Oh no, the seam allowance!" so I cut it again with suggested measurement. As a result, it came out too big... :( Oops, I should've used the first cut-out...! I think it would've been perfect if I used oilcloth instead of cotton as it would've hold itself up though. Oh well. As long as it keeps the dust off of my baby, it's okay! Plus, it's cute!


This is the slit part for the power cord. :)


It gives me a smile every time I look at it! That's all it matters!! :D
Now I'm thinking what to make next...
Oh, I'd better finish another knitting kit first...


See you soon!